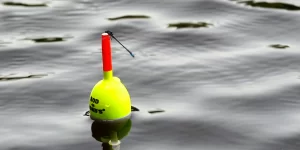
Using a bobber, or float, on your fishing line is an excellent way to detect bites, control your bait depth, and increase your chances of catching fish. Bobbers are essential tools for anglers of all skill levels, making fishing more enjoyable and productive. Here’s a comprehensive guide on how to put a bobber on a fishing line.
1. Choosing the Right Bobber
- Types of Bobbers: There are various types of bobbers, including slip bobbers, fixed bobbers, and weighted bobbers. Each type has its advantages, depending on your fishing situation.
- Slip Bobbers: These allow the line to slide through the bobber, making them ideal for fishing at different depths.
- Fixed Bobbers: These are attached at a fixed point on the line and are suitable for shallow waters.
- Weighted Bobbers: These bobbers have added weight to help cast further and maintain stability in rough waters.
- Size and Color: Choose a bobber size that matches the weight of your bait and line. Brightly colored bobbers are easier to see, especially in low-light conditions or rough waters.
2. Preparing Your Fishing Line
- Selecting the Line: Use a line appropriate for the type of fish you are targeting. Lighter lines are suitable for small fish, while heavier lines are better for larger species.
- Adding a Weight: Depending on the buoyancy of your bobber and the type of bait you are using, you may need to add a small weight (split shot) below the bobber to help it stay upright and cast effectively.
3. Attaching a Fixed Bobber
- Step 1: Thread the Line: Begin by threading your fishing line through the top and bottom hooks of the fixed bobber. Some fixed bobbers have a spring-loaded clip to secure the line.
- Step 2: Secure the Bobber: Adjust the position of the bobber on the line based on the desired depth and then secure it by clipping the line in place. Make sure it’s tight enough to stay in place but not so tight that it can’t be adjusted.
4. Attaching a Slip Bobber
- Step 1: Add a Bobber Stop: Slide a bobber stop onto your fishing line first. This will control the depth at which your bobber stops sliding. Bobber stops can be made of string or rubber.
- Step 2: Thread the Bobber: Thread your line through the hole in the slip bobber. The line should move freely through the bobber.
- Step 3: Add a Bead: Place a small plastic bead on the line after the bobber. This bead prevents the bobber from sliding past the bobber stop.
- Step 4: Attach a Weight and Hook: Add a small weight below the bobber to keep it upright. Tie your hook to the end of the line and attach your bait.
5. Adjusting the Bobber
- Depth Adjustment: Adjust the bobber stop to set the fishing depth. Slide the stop up or down the line to change the depth at which your bait is presented.
- Visibility Check: Ensure the bobber is visible on the water’s surface. If the bobber is submerged, you might need a lighter weight or a more buoyant bobber.
6. Fishing with a Bobber
- Casting: Cast your line gently to avoid tangling the bobber and line. Aim for areas where fish are likely to be feeding.
- Watching for Bites: Keep a close eye on the bobber. Any movement, such as sinking, bobbing, or moving sideways, indicates a bite. Set the hook quickly but gently to catch the fish.
Using a bobber on your fishing line is a straightforward process that can greatly enhance your fishing experience. By selecting the right bobber, attaching it correctly, and adjusting for the appropriate depth, you can effectively target a variety of fish species. Whether you’re a beginner or an experienced angler, mastering the use of a bobber will help you catch more fish and enjoy your time on the water.
Image: rod-n-bobbs