Building your own fishing rod can be a rewarding and creative experience. Whether you’re crafting a baitcaster or a spinning outfit, the general assembly process remains similar, with slight variations. In this guide, we’ll focus on creating a spinning outfit with a full cork grip.
- Find the Spine: Locate the spine of the rod by making marks on the blank using a china marker. This step enhances the overall performance of the rod. Mark a 3- to 4-inch line on the rod blank to aid in aligning the reel seat and mounting the guides.
- Mark & Prep the Grips: Lay out handle components and mark dividing points on the rod blank with a china marker. Slide grips down the rod blank and use a reamer to remove excess material, ensuring a snug fit. Use ProPaste Two-Part Epoxy to adhere the grips.
- Install the Grip: Apply epoxy at the marked line for the rear grip, spread it evenly, and slide the rear grip onto the blank. Rotate the grip to coat and seal it. Add epoxy to the inside of the butt cap and attach it to the rod. Remove excess glue with isopropyl alcohol.
- Install the Reel Seat & Fore Grip: Use masking tape to create raised arbors on the rod blank to support the reel seat. Apply ProPaste epoxy to secure the reel seat and foregrip. Ensure alignment with the spine mark and let it cure overnight.
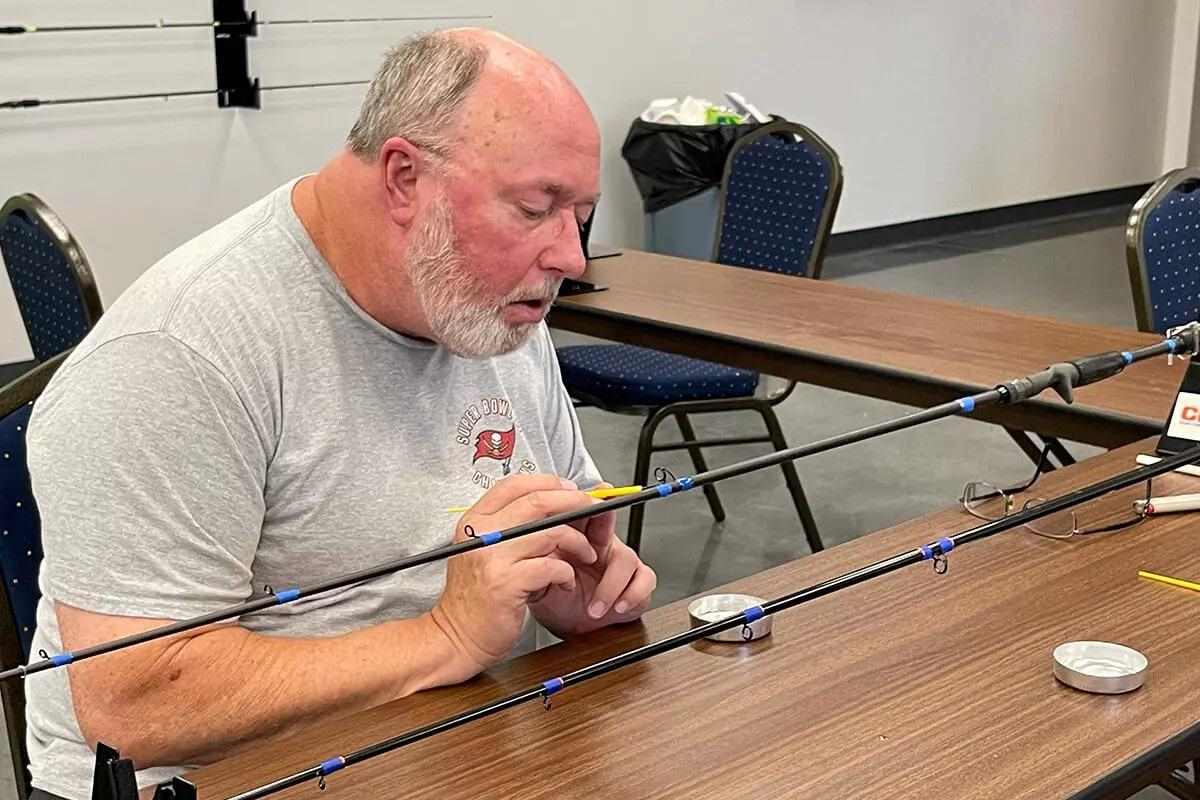
- Guide Prep & Spacing: Prep guides by filing down the guide foot for a smooth transition. Follow spacing charts provided by Mud Hole or the guide vendor. Mark guide points with a china marker and temporarily affix guides using tape, tubing, or foot adhesive.
- Tip Top Install: Use hot melt tip adhesive to install the tip top. Align it with other guides, ensuring a good glue bond. Verify alignment with the spine mark and reel seat.
- Guide Wrapping: Set up a hand wrapper, maintain proper tension, and wrap thread around the guides. Use a burnishing tool to minimize gaps in the wrap. Secure the thread with a pull-through, cut excess, and ensure a clean finish.
- Get Creative! Add Additional Wraps, Accents or Decals: Customize your rod with additional wraps, accents, decals, or inlays. Protect the rod by applying epoxy to cover decals and wraps. This step allows for creative personalization.
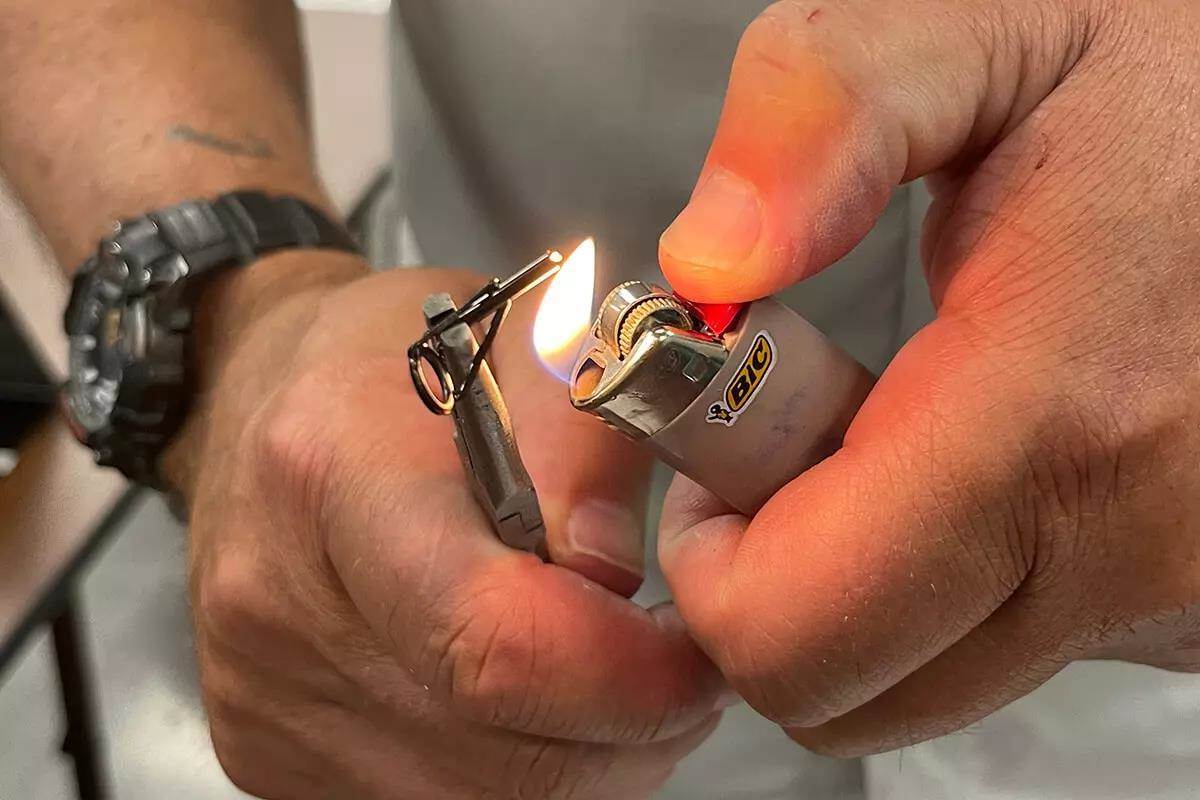
- Apply Epoxy: Mix PROKöte Thread Finish resin and hardener in a 50/50 ratio. Apply epoxy to guide wraps, decals, and additional wraps. Use a brush to create a clean edge, ensuring a thorough coating. Flame the epoxy with an alcohol burner to level it and remove bubbles.
- Let it Dry & Test it Out!: Allow the rod to sit in a rod drier for a minimum of 8 hours to ensure complete curing. Once cured, your custom-built rod is ready for action.
Final Thoughts: Building a fishing rod is a fun and rewarding experience. Seek advice from experienced rodbuilders, use quality equipment, and enjoy the process of creating a personalized fishing tool. Test your rod on the water and relish the satisfaction of catching fish with your own creation. Happy building!
Images/Source: FloridaSportsman