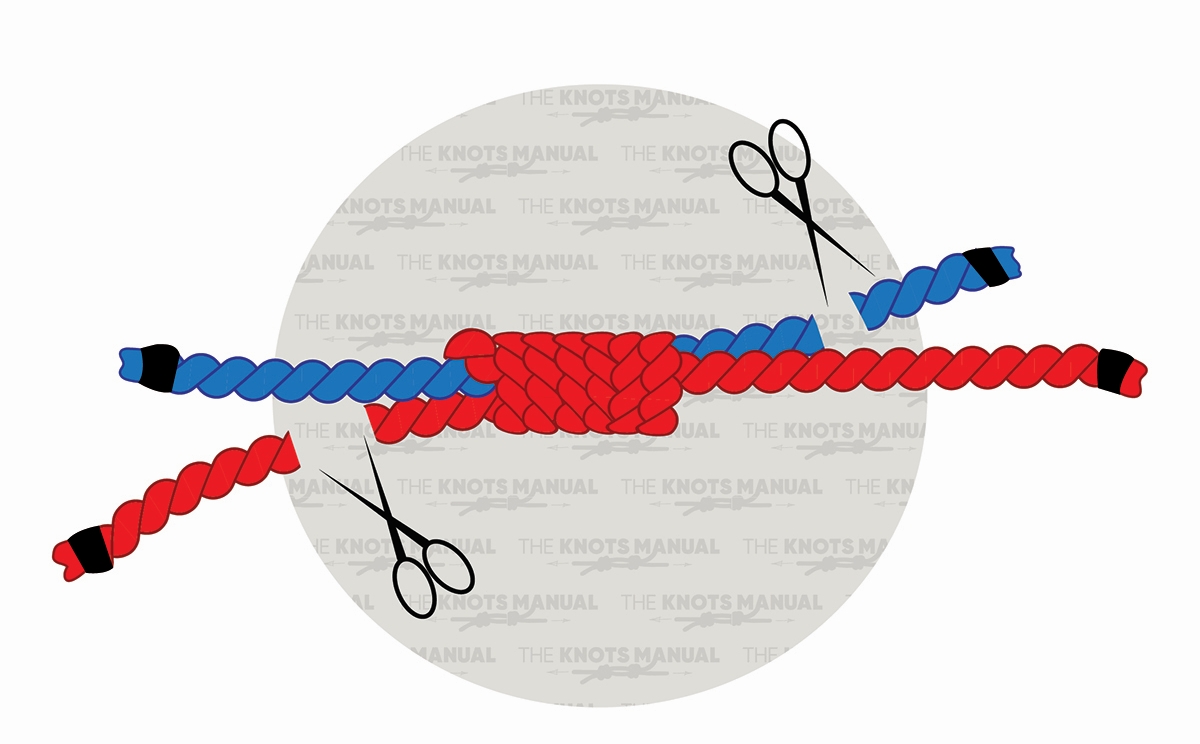
A nail knot is an essential skill for anglers, serving as a robust connection between the fly line and leader. Here, we’ll explore the intricacies of tying a nail knot, whether you have a specialized tool or not.
Introduction to Nail Knots: Nail knots excel in joining lines of varying diameters, providing strength, stability, and a streamlined profile. While nails were once used, modern anglers prefer hollow tools or straws for safety and convenience.
Similar Knots:
- Double Nail Knot
- Double Uni Knot
- Albright Knot
- Surgeon’s Knot
- Blood Knot
- Loop-To-Loop
What Is the Nail Knot? Also known as “tube” or “gryp” knots, nail knots connect fly lines to leaders, accommodating differences in diameter. Originally tied with a nail, contemporary methods involve needles, straws, or purpose-built tools. Nail knots are praised for their strength, slip resistance, and minimal water absorption.
Advantages & Disadvantages:
Advantages:
- Resistant to hinging
- Suitable for fluorocarbon lines
- Quick tying with a tool
- Strong and compact
- Doesn’t slip
- Minimal water absorption
Disadvantages:
- Challenging to tie without a tool
- Difficult to untie
- Tedious
- Difficult to replace the leader without ample lighting
How to Tie a Nail Knot:
With a Tool:
- Lay the tool against the fly line.
- Set the leader against the tool and fly line.
- Wrap the leader around the tool and fly line 5-6 times.
- Pass the leader through the tool’s hollow opening.
- Tighten the knot by pulling the leader’s working end.
- Trim the working end close to the knot.
Without a Tool:
- Double over the first few inches of the fly line.
- Create a loop with the leader, ensuring the butt faces the reel end.
- Hold the leader loop with thumb and forefinger.
- Wrap the leader over itself and both fly line legs 5-6 times.
- Hold wraps with left thumb and forefinger.
- Pull the leader’s tippet until the loop comes through.
- Continue holding wraps, pull the doubled-over fly line straight.
- Ensure the knot sits near the fly line end.
- Pull each line end to tighten the knot.
- Trim the ends of the line.
Mastering the nail knot enhances your angling repertoire, ensuring a secure connection for a successful fishing experience.
Images/Source: TheKnotsManual